|
Promenade On-Screen Controls
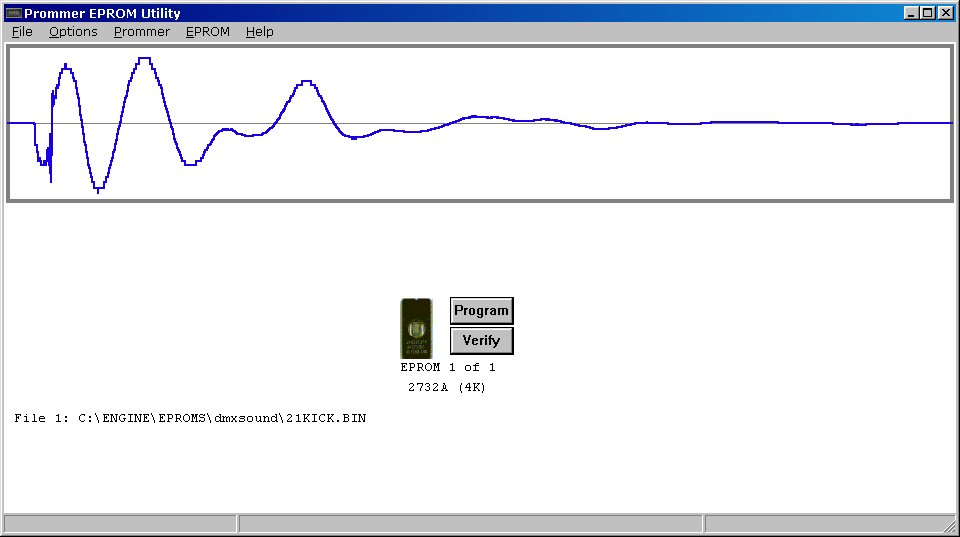
Simple EPROM ArrangementHere is a screenshot of Promenade with a sound file already
loaded into memory. In this most basic EPROM arrangement, there is one
sound sample for one EPROM.
You can drag and drop files from the Windows Explorer or desktop directly onto the main screen of Promenade to load them into memory. The file type will be determined from the filename extension (BIN, WAV or HEX) and converted automatically. Loading a new file will overwrite any sound already in memory. Clicking the mouse when the pointer is over the waveform window will play the displayed sound on the computer speakers. When you have the Prommer connected to the computer with MIDI cables and a blank EPROM loaded in the Prommer's socket, you can click the Program button to burn this sound on the EPROM. If Promenade is able to successfully communicate with the Prommer, transfer the data, and successfully finish the operation, a check mark will appear next to the Program button. You will have to watch the Prommer display to see when the programming operation is complete and click a button on a dialog box to tell Promenade that the EPROM programmed correctly or not. When programming is finished, you can (and should) press the Verify button to make sure the image on the EPROM matches the data in memory. When the image is verified successfully, another check mark will appear next to the Verify button. If there is a verify error, a red "X" will appear instead. A status bar at the bottom of the main window will show various messages when Promenade is communicating with the Prommer. The status bar is divided into three parts. The lefthand part indicates the current Prommer operation in progress. The middle part shows the result of the last operation, and the right part will indicate if the Prommer was detected or not. The Prommer detect message won't appear until you initiate communication with the Prommer by sending or receiving data. The space just above the status bar is used for a progress bar when
loading data from the Prommer.
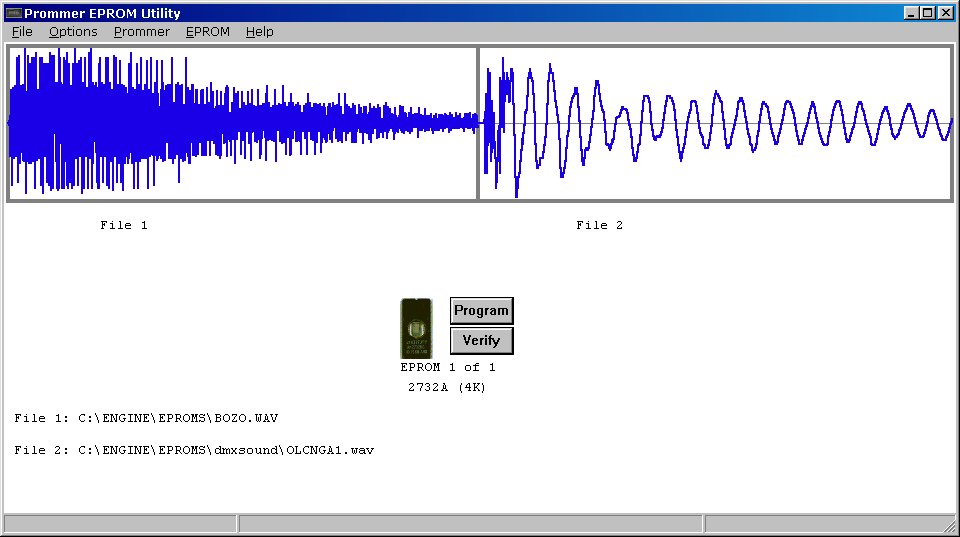
Different EPROM ArrangementsWith an EPROM arranged as two sounds on one EPROM, such as a DMX
percussion voice card would use, you will see a dividing line down the
center of the waveform display, indicating where one sound ends and the
other one starts.
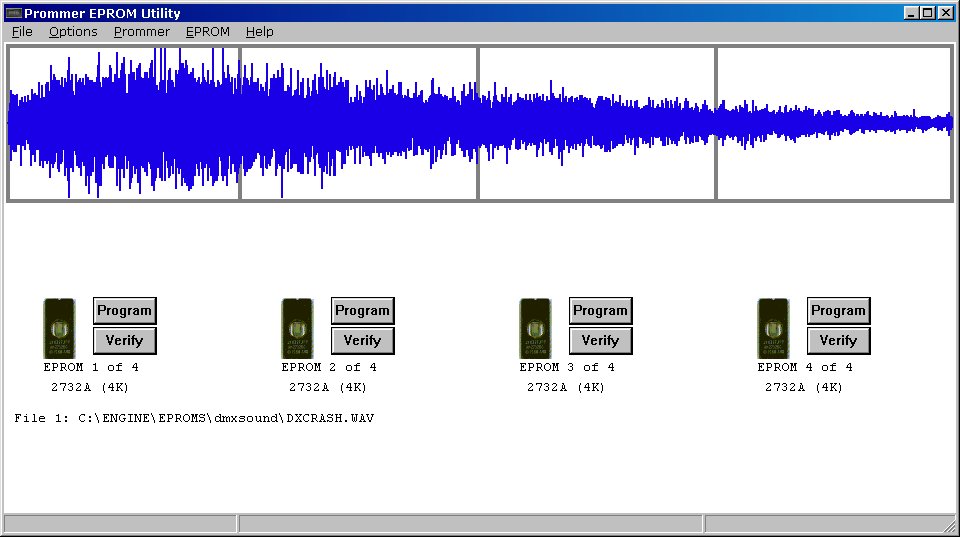
In this next example, one sound is spread across four EPROMs, as is the
case for the DMX Cymbal voice card.
Loading sounds works a little differently in this case. If you choose a file from the drop-down menu, it will be loaded into memory starting with the first EPROM and filling the entire memory range. If the sample you load is not as large as the memory space, the remainder will be filled with zero (audio) or FFh (data). Loading a file with drag and drop works the same way if you drop the file on the first (left hand) section of the waveform display, or anywhere else on the Promenade window. If you drop a file on any of the other sections of the waveform display, the file will be loaded from that section onward, leaving sections to the left unchanged. This allows loading a sound that is already divided into multiple file parts, combining the multiple parts into one as you load them. Just load one section at a time, starting with the left hand waveform display and working toward the right with the remaining files.
You will also see that there are now four sets of Program and Verify
buttons. These are used to program the separate EPROMs in any order.
This is where the check marks can come in handy, indicating which EPROMs
have already been programmed and which ones haven't.
|